Sunday, December 14, 2014

First b&w layout

I have been wanting to try using a black & white photo and I took this "perfect" picture last Friday.

Paper: DCWM
With Gelato, I doodled in dark blue & light blue, then used a brush to blend up the colours
Randomly, I used a palette knife to spread texture paste around...
For contrast, I used Tattered Angels "Coffee shop" mist and allowed the excess to flow around..
then I sprinkled Mr Huey's yellow (I asked my younger girl to help me here :P)

for the photo mat, I used a MS Round-the-corner punch to create 2 mats and put it diagonally to follow the flow. I used VersaCraft blue to colour it
then I embellished accordingly.... 

I'm not really sure if the cloud&rainbow really fits in the picture but it will do for now. until I get better and have more inspiration :-)

Friday, December 12, 2014

November fun


November is always a special time of busyness for me.
I celebrate the birthdays of my 3 girls and there are a lot of excitement and anticipation after watching their friends celebrate their birthdays before them.

This year, I decided to indulge them with their favourite wants. Frozen stuff for #2, #3 and football jersey for my eldest...

Now for the layout... :-)
I used paper from Heidi Swap and applied clear gesso. (I seem to like clear gesso more than white). I embossed randomly with a leaf stamp. I also sprinkled some mists.
I used a vintage metal heart shape from Daiso and some chipboard flourishes. a fairly simple layout.

Saturday, November 15, 2014

thank you cards

My kids are finishing their final year in their current school and we are having a birthday - cum - farewell party in school. other than packing the goodie bags for 3 classes (the school has only 4 classes), I also decided to include some 'thank you' card for their friends. 
My intention was to get them to write some sentiments, but ended up with a 'Thank you for coming to my party' kinda note. oh well. 
I will probably write a 'thank you' note to the teachers myself.
e
anyhow, I used a stamp set from EKsuccess It's a party! for this. it comes with stamps of various sizes and also a punch for punch out the center. 
I used a seperate stamp for the word 'thanks'. I stamped and embossed with white powder for most. tried some with black. overall, it was quite fun and good way to practice stamping. it was definitely not perfect but it was good practice. 

mixed media venture

after I attended my first mixed media (MM) layout class with MWL, I decided to try it out. I had to prepare an anniversary present for a friend who is celebrating her 10th anniversary milestone as well as 1year bday of her 3rd kid. I've decided to do 2 layouts. but here's the first one.

i need to mount this on a 12x12 (like a mat) but otherwise it is completed.
I used Prima Bloom spray to make the 'cross', layered it with paper& paper strips, embellished it with some wood veneers & flairs.
I used gelatos to create the starburst effect.
for the 'frame' on the paper, I ramdomly stamped with brown ink, and I also used UT (Ultra thick powder) for the 2nd layer. since UT is transparent, I mixed with copper fine embossing powder to have colour.
it didn't turn out so bad. I'm pretty pleased with it, but it is a far cry from those 'expert' work.

MM is actually quite fun and there are a lot of possibilities, much more than with simply paper, in my opinion. Right now, I can't decide if die-cutting is a bigger investment or MM, or which has a better ROI. I suppose it is just a different style and really depends on which is your style.


Monday, November 10, 2014

baby album - EJ

it's been a while since I made a baby album. I don't think I've actually uploaded their pictures.

Since I've made a few to-date, I have a rough idea how to start, but I must admit that I didn't have much time to do this and my brains were stuck.

Thankfully for a pack of baby-boy journaling cards I bought. I used more than what I expected.

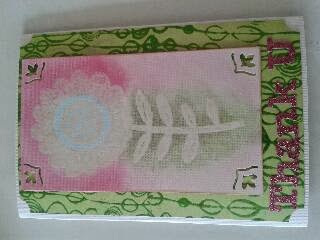
for the Cover: I applied clear gesso on it, sprayed it with 2 colours and left it to dry. I then used EK heart punch to punch hearts shapes and just layer them.
I "gesso-ed" the chipboard E, J and put VersaCraft red on it.I used small lettering to put the name on the chipboard. decorated with some heart-ribbon and a bit of blings.

As this album is for a boy, I couldn't use much flowers or the like, so I ended up using wood veneers & stamps.

I used paper from a stack, so that it all coordinates. my first album was using random pages and what a headache it caused me.

pages 2&3 were dedicated to baby's family.

pages 4&5 was for 3 months milestone.
I also added an insert to break the monotony and to give some space for journaling, if so desired.
the flap was for "random facts about me"

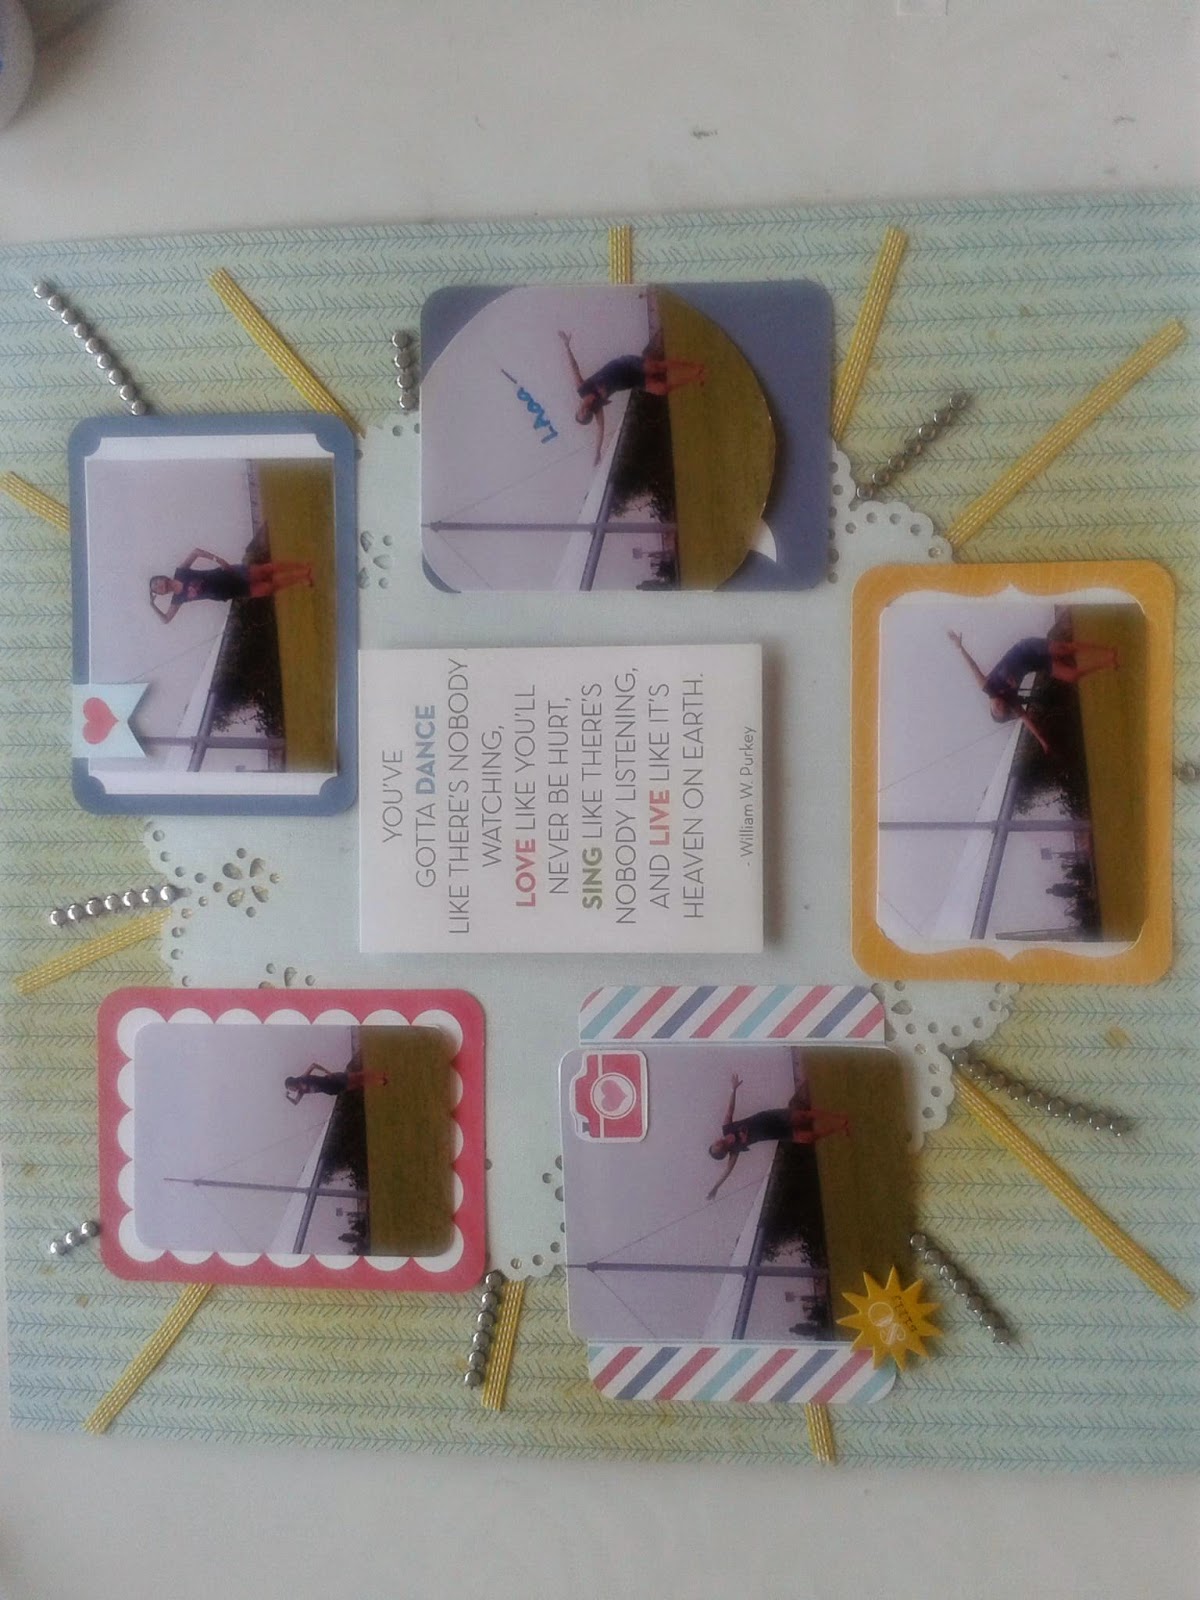
pages 6&7 was random pictures
on page 7, I mildly decorated the page so that a full 4x6 picture could be inserted. the rest of picture slots were either 3x4 or 3x3.

pages 8&9 was for 6 months milestone.
there is also an open flap on the right for more photos.

pages 10&11 was 9 months milestone

pages 12 was dedicated to 1 year milestone though it was not explicit.I used a stamp for 'walking feet'.

There were very few captions as I was really out of ideas, although 'bath-time', 'grandparents' were among some of the pages in previous albums. Partly it was due to a lack of appropriate embellishments, which made me aware of the need to top up!

to be honest, i do have, but it was mostly for girls and the recent deliveries are going to be boys!

paper punches to create different edges and also using ribbons between pages to create textures in place of blings.

Overall, I thought it was pretty nice for a boy :)

Sunday, October 26, 2014

stamps

I bought this set  of stamps from someone else' stash and it must be one of the best addition to my collection.
As my kids love to play and I have lots of photos, it really enabled the journaling  process. 

really happy with my purchase :-)

good times - leg0 exhibition

this photo was taken almost 2 years back when we went for the Leg0 exhibition. The kids were standing over the air duct in the shop and immediately their imagination took to flight.
I remember this day because we had lots of fun. 

I haven't layered paper in a long while and wanted to do it. However, it wasn't as complicated as I would like it to be.
I used Project life cards for sentiments.
Cut out green velium to overlay, followed with an embossed heart & a brad and cut washi tape into an arrow to bring focus to the sentiment "good times".

I made 3 layouts instead of using Project Life, since Hubs commented that my layout consisted mainly of single photos. 
for the first 2 layout, I used printed paper for photo mats. it adds colour to a otherwise plain black or blue background. I used orange distress ink to bring out the photo mats from its blue background. quite happy with the effects.
with the first layout, I used paper punches to bring even more dimensions & textures.


This layout was done a long time ago, when I first started out. hopefully my skills has gotten better with practice. :-)


Tuesday, October 14, 2014

Kids wanna have fun


I finally used the Mambi Kit given to me by my friend a long time ago. "Kids wanna have fun".
I used a background from DCWV Modern Meadow Stack, with some japanese origami papers for the layering behind the photos.

I altered a chipboard sun/flower. I embossed the outside with yellow. for the middle, I used red Versacraft and then embossed it with gold glitter.

All the accents & sentiments comes from the Mambi kit, except for the 'grass' at the bottom. Those are die-cuts I bought from the store.

I used good, old cotton wool for clouds & a bird brad. I folded the corner down and used sky-blue versacraft ink to colour both the white background and the white card-stock I've sticked behind it.

As for the little banner behind the word "kids", I used the banner chipboard that came with the kit. I traced it onto paper, cut it, and inked it with purple versacraft ink (again).

One thing I discovered:
1. I like DCWV paper pads
2. I like versacraft pigment inks, compared to distress inks. I believe it has to do with the range of colours available. Somehow with distress inks, not only are they expensive but there is a limited range of colours.
3. Paper layering is a great way to give depth to a project.
4. Chipboards! super fun. will start buying/hoarding them :)

Saturday, June 28, 2014

We love you daddy

I was/am very inspired by one of the layout done by Jelibeanz and I tried a bit to layer my photo with flowers. turned out to be quite simple.
Once again, I used my white felt lettering and inked it with my red Versa and I had beautiful lettering red lettering :-)
I also used my new EK <3 stamps and embossed it. However, the effect of red ink with clear emboss wasn't striking enough. I have since bought red emboss powder to use with my red ink. :-)

Monday, June 23, 2014

First foray into cards

I made this card for Vicky's piano teacher who is resigning.
the techniques and inspiration came after I attended a class at JDA.
I learnt background stamping (green) and white-on-white stamping, with masking. 
I liked what I learnt and would want to do more stamping soon!

I realized that mixed mediums is much more fun than die-cuts. although they are not complimentary. it's still essential to have a few paper punchers etc. Die-cut machines will be able to give your product the neat professional look. but I'm still wondering if it's worth the cost & the space! 

Wednesday, June 4, 2014

Childhood friends

I wanted to do a black & white theme but I really didn't know how and where to start.
After some searching on the internet for ideas, I have finally decided on a black & yellow theme instead.
I'm still quite far from my desired standard of layering but I'm working on it. Think I will have to attend some class sooner rather than later.

1. I used a stencil, neon yellow ink for the background yellow dots
2. string & yellow stickers for the top banner, which small boy/girl punch out.
3. my lettering was white felt, which I then sprayed with Mr Huey's yellow mist to stick to my colour theme.
4. Black & white washi tape interlaced with string
5. cutsie post-it stickers for the "little men" running
6. Feckle Fawn Enamel dew drop stickers.
7. brad with a chipboard tag

Wednesday, May 28, 2014

I love to play

Fefe loves to pose!
Daddy took these pictures and I couldn't resist but to scrap it. :)

1. Papers from DCWV Modern Meadows collection. Solid background colour also from DCWV.
2. I used thin, transculent paper bought from Daiso. 
3. I wanted the floral print but it was too distracting so I layered it the transculent paper. 
4. Simple embellishments to keep the focus on Fefe !

Tuesday, May 13, 2014

My first scrapbook challenge

I don't think I will win but I was going to create this layout anyway,  so might as well just submit it.
I'd never know. :-)

Thursday, May 8, 2014

How to survive a plane ride

Using those little alpha stamps which I bought.

I didn't think too much about it and was even attempted to sell/give it away until I kinda understood its usage.

See,  I am usually a late adopter of whatever-it-may-be. :-)

Thursday, May 1, 2014

Zoo mini album

I started working on this album quite a while ago but I've recently completed it :)

It was good to document my adventure with my kids and to 'watch them grow'.

I used the zutter to bind it together.

In it, I used Martha Steward Doily punch and Floral Web and Wild-flower round-the-edge punch.

When I "zuttered" the pages, page with the round-the-edge punch tends to be a little more filmsy. Probably it won't be such a good idea for 'zuttered' mini albums.


Round the page puncher: Wild flowers

Nobody does it better than Martha Stewart. I'm so sold on her products :)

This was the first punch I bought from MS and I adore it.


I've used it a lot for my mini albums


Use a distress ink to distress the sides a bit and the effect is wonderful :)

Martha Stewart Circle Edge

When I bought the starter kit, I bought another circle punch to go with it.


i think I will be using these punches very often :-)

Martha Stewart: Circle Edge starter kit/Doily puncher

When I saw this item in the stores, I couldn't resist it.


I cut a 6" for the main circle and I used a quarter piece for my 9" (it was sort of a scrap piece of paper) and I layered it. Love it!


Saturday, April 19, 2014

So very precious

This is a fairly simple layout.
I love this photo so much that I printed a duplicate without knowing. Instead of junking it, I decided to emphasise it.

I used 2 duplicate Webster papers (which came in the Nov warehouse sale kit). I cut out flowers from the 2nd piece and popped them up. It's to give the "duplicate" effect.

I also destressed the edges so it wouldn't be so sharp.

Tuesday, April 15, 2014

Silhouette Cameo

I'm quite sold on this product.

It no only cuts any designs that you print but it also writes. Seriously, my journaling will look so much better from now on.

I'm pretty tied up with work,so I really can't scrap. I've been working on PL as and whenever there is a bit of time, printing and slotting in photos.

but be sure, I will be buying the Cameo before the year runs out. :)

Thursday, April 3, 2014

Fun with daddy

A simple layout with lots of photos.


She has a special place in Daddy's heart.

Sunday, March 30, 2014

printer update

I found out that my printer wasn't spoilt.

I bought a few packets of 4x6" paper and in my eagerness to scrap/print, I took them out of their packages and the side started to curl. That curled up portion caused the misalignment once they were off the rollers and on the print-bed. nonetheless, I've resolved that. *phew* saved me a trip to the service center.

I also discovered that the printer works best with HP paper and not Canon. Even though I've straightened my Canon paper, I suspect the thickness isn't right and misalignment still occurs, although lesser.

One major overlook mistake I made was, I forgot to ask if my printer does BORDERLESS printing. it was such a major mistake that I almost took it back to return, except that they probably won't refund since I've already started using it.

All my printout has at least a 3mm margin which I would have to cut and mount onto a photo-mat if I were to keep the 4x6" size. This is quite a PAIN. Lots of trimming.

So, eventually now, I've taken to formatting my photos on MS Word so that I can print the exact size. I can squeeze 3 3x4" onto 1 a4 paper.

I use photoscape to help in editing. It was a recommended software and it is really quite good. In the editor mode, it has got pre-defined cropped sizes and a button for quick-save. Fuss-free, idiot-proof. Once I insert the image to MS Word, it is very easy to resize (accurately). The photo tools in MSWord isn't too friendly

My printer works fine with a4 paper. All in all, this additional editing takes up a bit more time (in the edit phase) but much lesser time in the scrapping phase and it makes pretty pictures. I'm happy to do the additional steps.

But people, please ask for BORDERLESS printing! *slaps forehead*

Thursday, March 27, 2014

Sunday, March 23, 2014

printer woe

My new inkjet printer Epson L355 is causing me some woe.
for some strange reason, it starts to misalign in the last 15mm of print, just after it rolls off the printer roller and is on the ink-bed, printing the last 15mm. I get a whole rainbow of colours. 
Causing me much much grief.

I hope that it is still under warranty cause I did not send out my registration card. :( who would know that it would fail in under 3 months? in fact, in under 2 months? omg.

and just when I will have a whole weekend to myself to be doing more of Project life: Kids

I sure do hope I get it resolved within the week.

in the meanwhile, I will finish up whatever I need to do with my current stash of photos.

Honestly, Project Life is really cool :)

Tuesday, March 18, 2014

paper trimmer - cuterpede

one of the first tools I bought was a paper cutter.
extremely useful to cut long strips of paper neat & straight.


it is debatable which brand is the best or most accurate but it really depends on your personality.
are you using the cutter to cut or to measure? personally, different rulers has different measurements too, if you get what I mean. I also bought the different cutters to interchange and it has added a lot more varieties to my edges.

check it out.


Monday, March 17, 2014

The thing about scrapbooking

When I first started, I have absolutely no clue how to go about it.

There are really a lot of paper, embellishments, hardware to buy. I would go to the store and just "jaw drop" and not know what to get.

I thought about the photos I want to scrap and tried to buy the paper and stuff that I think would go along. Sometimes, it did; sometimes  it didn't. In the end, I had to make a few trips and almost am randomly buying stuff. All these embellishments, ribbons, paper don't come cheap. I started to collect but I still wasn't getting anywhere.

My good friend was kind enough to come by and lend me some of her beautiful paper punches and to offer precious advice is terms of layout and I managed to finish these 12x12 after 3 afternoons each, spread over a couple of weeks, with lots of thinking in between.


not very efficient if you ask me.

I then decided, that part of being creative was to make use of EXISTING materials, instead of keep having to buy.

I still do buy, of course I have to. I need to replenish and I need to build a stash. But most of the time now, before I make a purchase, esp high value items, I ask myself how versatile it is and how many projects I can possibly do with them.

eg, I buy paper punches with classic designs that won't go out of time or be used for once before I get bored of the design.

I also recently bought a kit from Websterspages in their Nov warehouse sale.The box only cost USD20 and shipping it here probably cost me more. But they had collections of printed lightweight paper which helps tremendously in laying-out, and it also had a lot of ribbons. I looked at some of them and wondered how and when will I use those. They were bright, gaudy coloured, stuff that I would probably not buy. However, I'm pretty proud to say that I have used them in a lot of my recent projects.

Whenever I need some embellishments, ribbons or touch up, I would go dig that Webster box and lo! and behold! I would be sure to find something I could use. Mind you, I didn't choose any of the items in the box.

I'm pretty proud and happy with myself.

In conclusion, I would continue to buy 'generic' stuff and probably even invest in 1 or 2 subscription kits to establish a supply of papers and other paraphernalia that I can use.

Disclaimer: Buy only if you are actively scrapping. otherwise, the stash would simple be wasted. I have started from 2 boxes to almost a cupboard full :) But I really do love scrapping.

Sunday, March 16, 2014

having the right paper

my SIL gave me a stack of paper DCWV Oncea upon a time stack for my Christmas present. I didn't open it til today and it is a lovely stack of paper.

Immediately, I fell in love with it and found my inspiration to complete this 12x12, in under an hour.


yes, I starting on my Project Life kids for my kids. I've decided to work backwards. Since I have already some of their concert 2013 photos on hand, I am starting with this.
Simple, not much layering but I used EK 3D stickers to create the 3D effect.
Simple and pretty. :-)

Thursday, March 6, 2014

very addictive

Last night I slept at 1am doing Project Life - NZ. wow.

And today, I've went through my stash of scraps and cut out 3x4" and 6x4" of PL cards, ready for use.


Addictive, Obsessive. Proceed with caution

Monday, March 3, 2014

Project Life is starting!

I first saw Project Life about a year ago and I thought, it looks too complicated. I just started scrapping and I wasn't sure if I was ready to spend so much money on albums and sleeves (what sleeves?!). after a year, I begin to see the relevance of Project Life. 

 Scrapping for me was more than having a 12x12, with pictures inside, beautifully embellished. As I continued to scrapped, I realized what I wanted was to document my life and a 'snapshot' of 12x12 just didn't mean that need. 

First, i ain't so creative to be able to layer lotsa paper & lace to beautifully iconize a moment in my life. If I were to do that, I would have many many 12x12, to many to do. too poor to do that too. 2nd, i like mini albums. and mini albums have a use to categorize events. so, to expand that "mini album", 

I've decided to embark on "Project Life". I will be running a few albums con-currently as i have a 'backlog' One would be to document my kids' school-going years. 2nd would be my holidays. 

To kick start this ambitious project, I've ordered my albums from Amazon using their AmazonGlobalSaver. I have easily saved 40-50% off the albums & sleeves buying from the local scrapbooking store (LSS). :) wonderful! :) 

 I will try to add more pictures as I go along :)